sales@bonporaparts.com
0086-10-64988621
English
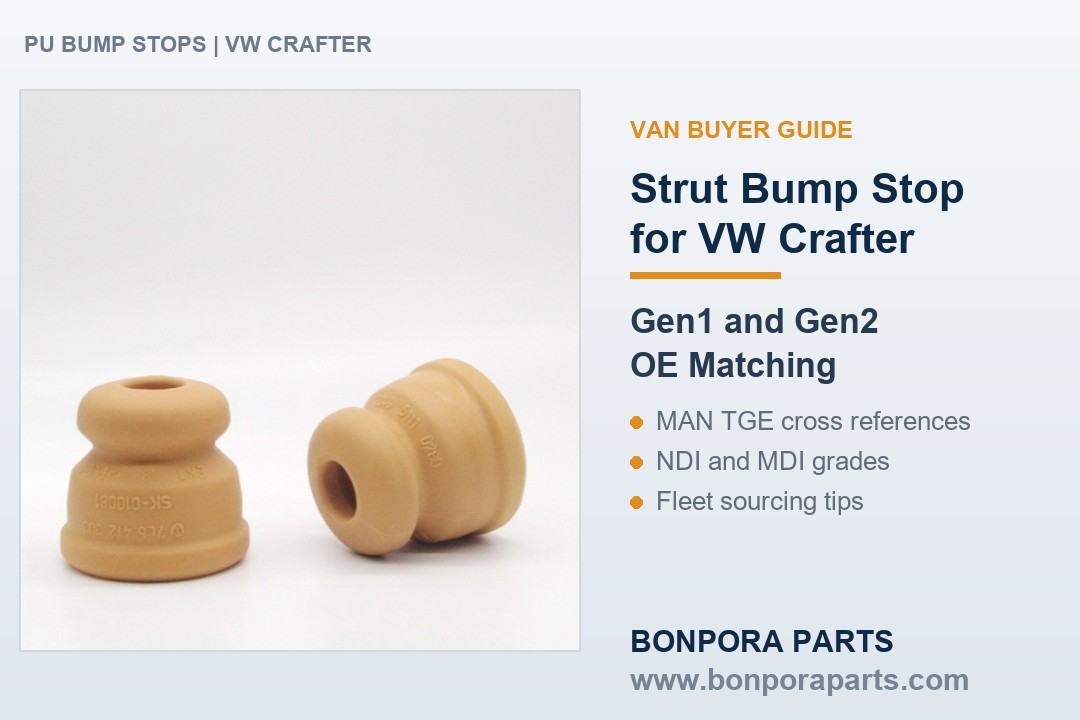
The VW Crafter has become one of the most common large panel vans on European roads, moving parcels, tools and pallets for fleets of every size. As these vans age, suspension parts enter a steady replacement cycle, and the strut bump stop is one of the items that wears quietly until a driver reports a hard knock over bumps. For parts distributors and fleet buyers, the Crafter also brings a specific sourcing challenge: two technically different generations share the same name, and each follows a different parts lineage. This buyer guide explains where the bump stop sits in the suspension, how to separate the two generations, how to work with OE part numbers, and which polyurethane grade suits each duty cycle.
The front axle of both Crafter generations uses a MacPherson-type layout. Each corner combines a coil spring, a damper and a top mount, with the strut bump stop fitted on the damper piston rod inside the dust cover. When the suspension reaches full compression, the bumper cushions the travel, so the body and the strut internals never meet metal to metal.
The bump stop therefore works as part of a system. Inside the damper, the piston rod carries the piston with its piston ring and valve plates, and the nitrogen gas chamber behind the oil column keeps the damper response consistent. The dust cover and the shock absorber protective boot keep water, salt and grit away from the rod seal, and the spring seat carries the lower end of the coil. If the bumper is missing or collapsed, every full compression event passes straight into the damper and the top mount, which shortens the service life of all of them.
On the rear axle, the Crafter uses a rigid axle on leaf springs, with auxiliary stop elements at the frame to control extreme compression under load. Those rear stops are a separate catalog family, so always confirm the axle position before quoting.
The single most important step in Crafter bump stop sourcing is separating the generations, because they do not share a parts lineage.
The first generation, built from 2006 to 2016, descends from the cooperation era of large vans and follows the same engineering patterns as the contemporary Mercedes Sprinter platform. Many chassis references from that era cross within that family, and the OE number prefix for Crafter suspension parts starts with the 2E0 series.
The second generation, introduced in 2017 as the Typ SY, was the first large van developed fully in house by Volkswagen, produced in Wrzesnia in Poland. Its mechanicals are shared with the MAN TGE, the sister model built on the same platform, and from 2018 the range also included the battery electric e-Crafter. For this generation, cross-referencing runs inside the Volkswagen Group family rather than to Stuttgart.
| Generation | Production years | Platform origin | OE number family | Cross-reference direction |
|---|---|---|---|---|
| Crafter Gen 1 | 2006 to 2016 | Cooperation-era large van platform | 2E0 prefix series | Contemporary Mercedes Sprinter patterns |
| Crafter Gen 2 | 2017 onwards | In-house VW large van platform | Newer VW prefix series | MAN TGE sister model |
For a distributor, the practical consequence is simple: a Crafter catalog entry must state the generation, and buyers with mixed fleets need both lines on the shelf. Application data that only says Crafter without a year range causes avoidable returns.
For Gen 2 vehicles, the shared platform with the MAN TGE means comparable chassis geometry and, in many cases, interchangeable service parts. Geometry is still the final judge: verify free height, diameter and mounting bore rather than trusting the badge alone. For Gen 1 vehicles, the parts trail leads back to the Sprinter-derived architecture of the era, and several suspension references cross between the two nameplates. A reliable supplier confirms each crossing with measured samples instead of a printed list alone.
VW part numbers follow a three-segment logic, and understanding it speeds up every inquiry.
The prefix identifies the platform or model family, for example the 2E0 series for first generation Crafter suspension parts. The base number identifies the main group: group 41 covers suspension and axle components, which is where jounce bumpers and related chassis parts sit. The suffix letter marks the design revision. A part can look identical to the eye while the letter suffix records a change in geometry or compound, so two items that share a prefix and base number are not automatically the same SKU.
A practical caution: molded markings on polyurethane parts often carry the number in a compressed or abbreviated form, and after years of service the text can be worn or distorted. When the marking is unreadable, fall back to the dimension checklist below and to the vehicle data plate rather than guessing from memory.
Crafter duty cycles are harder on progressive stop elements than typical passenger car use. The main reasons:
Payload. Vans operate near gross vehicle weight for much of their life, so compression events run deeper and more often, especially at the rear.
Urban routes. City delivery work means speed bumps, loading ramps, kerbs and rough yard surfaces, exactly the inputs that drive the strut into full compression.
Conversions. Motorhome and box conversions such as the Grand California ride permanently at high mass, with no unladen rest period for the suspension.
Electric variants. The e-Crafter carries battery mass low in the body, which raises the energy the bumper must absorb at each compression event.
Worn dampers. When a damper loses its oil film or gas preload, the suspension oscillates more and reaches full compression more often, loading the bumper with heat cycles it was not sized for.
This is why a collapsed bumper is rarely an isolated finding. It signals that the strut has been working at its travel limits, and the surrounding parts deserve inspection at the same service.
Original stop elements are generally microcellular polyurethane, and replacement ranges keep that choice for good reasons. The material decides how the bumper feels in the last centimetres of travel and how it survives fleet duty.
| Property | Microcellular PU | Conventional rubber |
|---|---|---|
| Load capacity per volume | High, progressive rate | Lower, needs more volume |
| Compression set resistance | Strong, keeps height | Collapses earlier in service |
| Temperature behaviour | Predictable across climates | Hardens in cold, softens in heat |
| Fleet service life | Long, stable damping curve | Shorter, property drift |
| Cost position | Mid | Low |
For a van that works daily, the difference shows up as ride consistency: a quality PU bumper keeps its progressive curve for years, while a worn or low-grade part collapses into a hard stop that transmits the very knock the bumper was meant to absorb.
Within microcellular polyurethane, the isocyanate base defines the performance ceiling. The two practical families are NDI-based and MDI-based compounds, and the choice follows the load and heat profile of the application.
| Application | Recommended base | Why |
|---|---|---|
| Gen 2 front struts, high-mileage delivery fleets | NDI-based | Best heat and compression set behaviour under frequent full compression |
| e-Crafter and heavy conversions | NDI-based | Extra vehicle mass raises energy input per event |
| Gen 1 light duty and city use | MDI-based | Cost-effective with comfortable reserve for the duty |
| Loaded rear auxiliary positions | NDI-based | Sustained static load plus dynamic events |
Hardness and density tune the rate curve within each family. A capable manufacturer will ask for vehicle model, generation, axle position and typical load before recommending a grade, and will confirm the recommendation with sample parts. Browsing a focused range of polyurethane bump stops by shape and size family is a faster starting point than reverse-engineering numbers alone.
When an OE marking is unreadable or a cross-reference is uncertain, dimensions decide. Measure the removed part cold and record the following:
| Item | What to check |
|---|---|
| Free height | Total uncompressed length of the bumper |
| Top and bottom diameter | Outer diameters at both ends, and the skirt profile |
| Mounting bore | Bore diameter and depth over the piston rod seat |
| Shape family | Bell, barrel or stepped profile, and any internal void |
| Compound feel | Approximate hardness by durometer if a gauge is available |
| Quantity per axle | One per strut, or paired items for the rear axle position |
Two photographs with a scale reference, plus these measurements, are usually enough for a supplier to identify the correct item from a catalog or to quote a custom run.
Because the bump stop sits inside the strut assembly, the same labour window covers several related checks. Fleet buyers get the best value by bundling the parts before the vehicle enters the workshop:
Dust cover and shock absorber protective boot. A torn boot lets water and salt reach the piston rod seal; replace it together with the bumper.
Spring seat. Cracked or flattened seats transfer noise and let the coil sit unevenly.
Top mount and bearing. Knock and steering notch are classic symptoms of worn mounts.
Piston rod surface. Scored surfaces, pitting or an oil film mean the damper itself is due for service.
Tie rod end and stabilizer link. Check play while the wheel is off the ground, since these steering and chassis items wear on the same urban routes.
A disciplined four-step workflow keeps returns low:
Identify the vehicle. Read the VIN and data plate: model year, generation, GVW variant and drive type. For the Crafter, note whether the van is a 2006 to 2016 Gen 1 or a 2017 onwards Gen 2.
Collect the reference. Record the OE number from the removed part, the workshop catalog or the parts label inside the van.
Verify geometry. Match the reference against the dimension checklist above, since revision suffixes can hide small changes.
Approve a sample. For any first order from a new supplier, fit one set on a representative vehicle before releasing the bulk purchase.
Operators running both generations need a parts strategy that treats them as two vehicles, not one. Stock the Gen 1 2E0-series line and the Gen 2 line separately, and label the bins accordingly. Standardizing on one PU grade per axle position across the fleet simplifies warranty questions and makes driver feedback comparable. Where volumes justify it, combine bump stops with shock absorber parts such as dust covers, spring seats and protective boots into per-vehicle service kits, so a strut overhaul pulls one bin instead of five.
For wheel-off service intervals, a useful rule is to inspect the bumpers at every second spring service and to replace them in axle pairs. Pair replacement keeps the damping behaviour of both corners matched, which matters for braking stability on a loaded van.
Whether buying branded or unbranded stock, a short incoming checklist protects the fleet:
Dimensions measured against the agreed drawing, especially free height and bore.
Density and hardness recorded per production batch.
Compression set data for the actual compound, not just the family datasheet.
Appearance: clean parting lines, no flash into the bore, no surface cracks.
Batch marking for traceability back to production records.
Packing that avoids sustained point loads and states a carton stacking limit.
Not every Crafter-derived application ends at the catalog. Lift conversions, special bodies and export variants sometimes need a geometry or a grade that is not on the shelf. In those cases a manufacturer with in-house tooling can develop from a drawing or from a used part: the sample is measured, a compound is recommended from the duty data, a prototype mold is cut, and samples are validated on the vehicle before release. This route also serves wholesalers who want their own range numbering on a proven geometry. The custom parts process typically moves from drawing review to approved samples in a few weeks, depending on complexity.
A 2014 van is a Gen 1 vehicle, so the suspension references sit in the 2E0 number family. Record the OE number or measure the removed part, then match it against the dimension checklist. Cross-references to the contemporary Sprinter architecture are common for this generation, and a supplier can confirm the crossing with sample parts.
For the Gen 2 platform the two models share their mechanical basis, so chassis references are often comparable, and bumper geometry frequently matches. Treat the platform as a strong lead rather than a guarantee: confirm free height, diameters and mounting bore, or approve a physical sample, before committing stock.
Deep, frequent compression events with heat buildup point to an NDI-based microcellular polyurethane, sized for the axle position and load. MDI-based compounds remain a sensible choice for lighter duty Gen 1 use. Share the fleet duty profile with the manufacturer and confirm the grade with sample parts.
Yes. A used part plus the vehicle data gives the manufacturer everything needed: measure the geometry, identify the grade from the duty profile, and quote from an existing or a new mold. This route is routine for conversion builders and export markets.
Bonpora manufactures microcellular polyurethane bump stops in NDI and MDI grades, together with dust covers, spring seats and a wide range of chassis and suspension items for European vans, and supports drawing and sample based development for special applications. Send the model year, axle position and your reference numbers, and the team will confirm fitment, recommend the grade and quote from the closest tooling.
