sales@bonporaparts.com
0086-10-64988621
English
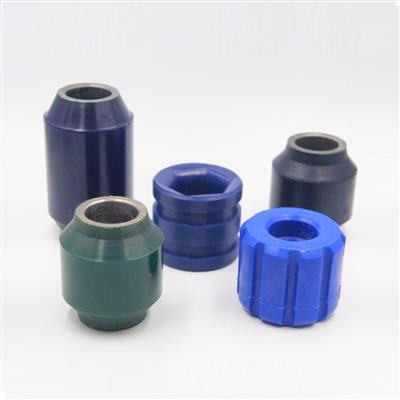
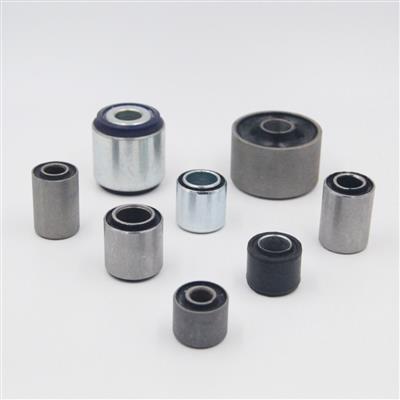
A bushing, also called a suspension bushing or control arm bushing, is installed at suspension control arms, stabilizer bar connection points, subframe to body attachment points and similar locations, positioned between two metal components. It provides an elastic connection that allows relative motion, whether articulation or torsion, while absorbing road impacts and limiting radial and axial displacement of the suspension kinematic pairs. The tubes are normally carbon steel or aluminium alloy, and the elastomer is natural rubber (NR) or polyurethane (PU).
A correctly specified bush can still fail early if it is fitted badly. Most repeat failures that reach a workshop within a few months trace back to the fitting procedure rather than to the part, so the steps below set out a sequence that protects the bond, the housing bore and the elastomer.
Three things decide whether a replacement bush lasts its design life. The housing bore has to be sound and within tolerance, the bush has to go in without loading the elastomer or the bond, and the pivot has to be tightened with the suspension at its normal ride position so that the rubber is not held in torsion before the vehicle moves. Everything else in this guide supports those three points.
| Item | Purpose | Note |
|---|---|---|
| Hydraulic press or threaded bush driver set | Push the old bush out and the new one in | Drivers must match the shell or shoulder diameter |
| Correct size receiver cup | Give the shell somewhere to go | An undersized receiver distorts the shell |
| Torque wrench | Pivot and bracket bolts | Range must cover the values in the workshop data |
| Shore A durometer | Check the old part and verify the new one | Useful for a warranty record |
| Bore gauge or internal micrometer | Measure the housing bore | Confirms the press fit before fitting |
| Deburring tool and fine abrasive | Dress the bore and the shell edge | Removes corrosion and burrs |
| Rubber compatible assembly lubricant | Ease insertion | Soap and water based products only on natural rubber |
| Alignment or marking pen | Index the bush to the housing | Keeps the void layout correct |
The preferred method is to press the bush out on the shell, using a driver that matches the outer tube and a receiver cup that supports the arm around the bore. Pressing evenly on the shell keeps the arm true and leaves the bore undamaged, which is what the new bush depends on.
Cutting the rubber and the shell out with a blade or a hacksaw is sometimes the only option on an arm that cannot be pressed, but it carries a real risk of scoring the bore. Burning the rubber out is the least desirable method: the heat distorts the arm, leaves a residue that must be completely removed, and can anneal a light alloy housing. Where either method has to be used, the bore must be measured and dressed afterwards before a new bush is considered.
Note the failure mode of the old part, whether the bond had separated, whether the shell had been rotating and whether the rubber had hardened or swollen. The pattern across a fleet is what tells a buyer whether the specification, the fitting method or the duty cycle needs to change.
The bore is the part of the job that is most often skipped and most often responsible for a repeat failure. Measure it at several points around the circumference and along its length.
| Bore Condition | Effect If Ignored | Suggested Action |
|---|---|---|
| Within tolerance and round | None, proceed with fitting | Clean and apply the correct lubricant |
| Light corrosion or varnish | Reduced interference, possible rotation | Dress with fine abrasive and re measure |
| Scored or burred | New bush distorted on entry | Deburr, then confirm the fit |
| Oval or oversized | Shell rotates and wears the bore further | Replace the arm or fit an oversize repair bush where available |
| Previously repaired badly | Repeated failures at short intervals | Assess the arm against the drawing before ordering |
This step decides whether the bush works as a bearing or as a torsion spring. A bonded bush is designed to be at its neutral position with the vehicle at normal ride height. If the pivot bolt is tightened with the suspension hanging at full droop, the rubber is already twisted when the vehicle is lowered, and it will tear progressively from the first kilometre.
| Step | What to Do |
|---|---|
| Assemble loosely | Fit the bolts and nuts finger tight with the arm in position |
| Set ride height | Support the suspension so the arm sits at its normal running angle, or lower the vehicle onto its wheels on level ground |
| Bounce and settle | Work the suspension through a few cycles so the bushes take up their neutral position |
| Tighten to torque | Tighten the pivot and bracket bolts to the workshop values at that position |
| Check the bar and links | Do the same for anti roll bar bushes and links disturbed during the job |
| Error | Consequence | Correct Approach |
|---|---|---|
| Pressing on the rubber or the inner tube | Bond torn during fitting | Press on the outer shell or the shoulder only |
| Tightening at full droop | Torsional wind up and early tearing | Tighten at ride height after settling |
| Ignoring a worn bore | Shell rotates, housing wears further | Measure and dress the bore first |
| Using petroleum grease on natural rubber | Compound swells and softens | Use a rubber compatible lubricant |
| Fitting one side only | Uneven load sharing and a new noise | Replace both sides where mileage is comparable |
| Wrong orientation of the void layout | Stiffness in the wrong direction | Follow the drawing or the mark on the shell |
| Forcing a tilted bush | Shell distortion and a poor press fit | Withdraw, check and restart squarely |
| No road test | Missed assembly mistakes | Test over the same route that produced the complaint |
On some arms a threaded driver set or a heavy duty vice can be used, provided the force is applied to the outer shell and the arm is supported squarely. The method matters more than the tool. Where a press is not available and the arm cannot be supported properly, removing the arm and having the bushes pressed elsewhere is usually cheaper than a damaged bore.
Yes, or with the suspension supported at its normal ride position. A bonded bush is designed to sit at neutral at ride height, and tightening at full droop preloads the rubber in torsion. This single step accounts for a large share of early bush failures.
Where both sides have covered similar mileage, replacing them together is the usual recommendation, because a new bush beside a soft aged one changes the load sharing and can introduce a new noise. A single side replacement is reasonable where the failure was caused by local damage such as an oil leak or an impact.
Duration depends on the design, since some arms can be done on the vehicle and others must be removed. Anything disturbed during the work, such as anti roll bar bushes, bump stops or retaining bolts, should be inspected and replaced if worn, because the labour is already committed. See how related wear items are specified on the polyurethane bump stop and shock absorber parts pages.
Bonpora Parts supplies suspension bushes and control arm bushes with carbon steel or aluminium tubes and natural rubber or polyurethane elastomer, built to the bore, shell, length, flange and void layout shown on your drawing, with hardness, stiffness and bond test results available for the production batch. Where a bush has failed repeatedly at the same position, send the failure detail and the installation method and our engineers will review the compound, the stiffness and the fit. New dimensions are quoted from drawings or samples under custom moulded and bonded parts. Begin with the mounting bush range, review the wider chassis and suspension programme, or contact our team with your specification and annual volume. Further references are listed on the products page.