sales@bonporaparts.com
0086-10-64988621
English
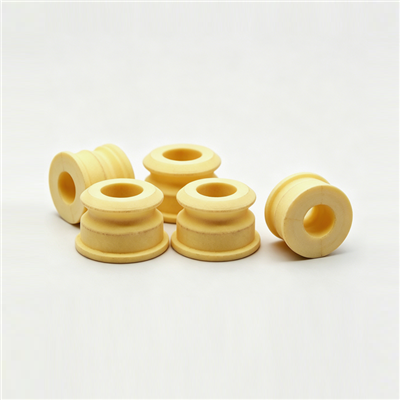
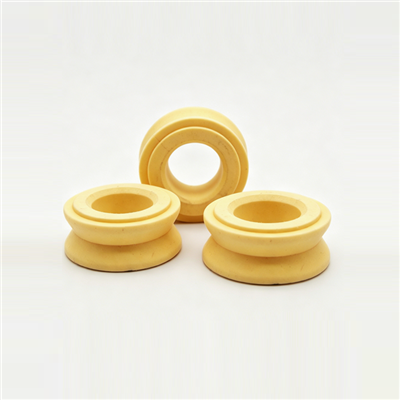
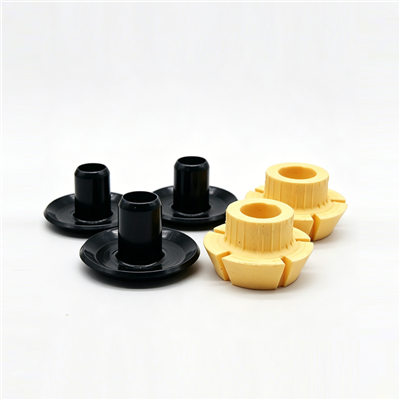
The buffer for cabin in the Bonpora catalogue is an elastic component typically made from high-elasticity polyurethane, installed between the truck cab and the chassis frame. It behaves in the same way as a jounce bumper, also called a bump stop, bump rubber, rubber buffer or strut bumper, and provides progressive auxiliary stiffness at the end of the compression stroke.
Because the part is normally passive, it spends most of its life unloaded and only works when the gap closes. That pattern produces a specific ageing profile. The upper and lower faces stay clean and flexible while the free surface at the edge sees the highest strain each time the buffer is compressed to its stop. Fatigue therefore starts at the edge, and the visible condition of that edge is the single most useful indicator of how much life is left.
Two secondary factors decide how quickly the part reaches that point. Heat from the exhaust or the engine compartment accelerates hardening, and oil or fuel contamination softens the surface and starts small cracks. A buffer that sees both will fail well before the quoted design life, which the source row states as not less than 80,000 km or two years under normal use.
Small radial cracks appear at the outer diameter and grow towards the centre. Early cracks are cosmetic; once they join and expose a torn surface, the effective load area is reduced and the buffer can no longer hold the stiffness curve it was specified for.
After removal, a healthy buffer recovers most of its original height within a short time. A deformed part stays flat or cupped, leaves a smaller gap at static ride height, and reaches its stop earlier. This shows up first as a hard knock over sharp bumps.
Thermal ageing can make the compound stiffer and less resilient. The part still looks intact but the cab feels harsher, because the buffer starts carrying load earlier in the travel. This mode is easy to miss on a visual inspection and is normally confirmed with a hardness check.
Where the buffer is bonded or clamped into a steel sleeve, the interface can fail. A loose or rotating buffer is a clear fault and should be replaced, because the bond no longer transfers load in the intended direction.
Oil, diesel or hydraulic fluid on the surface accelerates cracking and can cause the surface layer to swell. Cleaning a contaminated buffer is not a repair, because the change to the compound cannot be reversed.
| Symptom reported | Likely buffer condition | First check |
|---|---|---|
| Hard knock over sharp bumps | Permanent set, reduced gap | Measure static gap at ride height |
| Harsher cab ride than when new | Hardened compound, early contact | Hardness check against a new part |
| Visible surface cracks | Fatigue cracking at the edge | Depth of the cracks and load area lost |
| Cab feels loose or rocks in braking | Worn mount rather than buffer | Play in the mount, pivot or stabiliser link |
| Continuous rattle rather than a knock | Loose fixings or debris | Fastener torque and trapped stones |
| Wet area around the mount | Oil or fluid contamination | Source of the leak before any replacement |
The table matters because several of these symptoms are not caused by the buffer at all. Replacing the part without correcting the underlying cause produces the same complaint a few months later.
Park the truck on level ground and look at the clearance between the buffer and the face it contacts. Compare left and right, and front and rear. A difference between the two sides of the cab is the fastest indicator of a partially collapsed buffer.
Wipe the dirt away and look for radial cracks, a shiny glazed band where the part has been rubbing, and any trace of oil. Record what you find rather than judging it from memory.
Grab the cab mount area and look for movement in the fixings, cracks in the bracket, a seized pivot pin or a damaged stabiliser link. Anything loose in this area will imitate a buffer fault.
On an air suspended cab, verify the air spring charge and the correct ride height before concluding that the buffer is at fault. A low air charge lets the cab sit closer to the stop and produces exactly the symptoms of a collapsed buffer.
Where a fleet wants a documented decision rather than a visual judgement, three measurements are enough as long as they are compared against the same reading taken on a new part.
| Check | How it is taken | Result that justifies replacement |
|---|---|---|
| Free height recovery | Remove the part, let it rest, measure the height | Height remains clearly below the new part after resting |
| Hardness | Durometer reading on a flat face | Reading outside the tolerance band agreed with the supplier |
| Visual crack assessment | Inspect the edge after cleaning | Cracks joined into a continuous tear |
| Bond or clamp condition | Twist the buffer in its sleeve by hand | Any measurable rotation or movement |
| Compression set | Hold the part compressed, release and re-measure | Visible set that does not recover within minutes |
The source row names the inspections performed during production: static stiffness curve, compression set, hardness and appearance. Using the same four characteristics as the bench checklist keeps the field decision consistent with the factory acceptance criteria.
Before a replacement is ordered, four other conditions deserve a check. A worn mount or a seized pivot that lets the cab move further than designed will overload a healthy buffer. An undercharged air spring on an air suspended cab will hold the cab low and keep the buffer in contact. A missing spacer or an incorrect mounting sequence after an earlier repair changes the geometry. Finally, a cracked bracket or a corroded mounting plate moves the load path away from the design position.
Any of those four will reproduce the original complaint quickly if it is left in place, which is why a good workshop records the condition of the surrounding parts at the same time as the buffer.
The decision is straightforward once the measurements are in front of you.
Where a fleet runs several trucks of the same specification on the same duty cycle, it is worth recording the replacement mileage of the first few vehicles. That data turns a simple part number into a planned service interval instead of a breakdown repair.
Clean the seat and the contact face, confirm that no debris or old bonding material is trapped, and fit the new part with the fixings tightened in the sequence given for the model. On an air suspended cab, set the ride height before the final torque so that the buffer is positioned at its designed gap rather than being pre-loaded. After the first loaded run, re-check the fixings, because a new buffer settles slightly and can reduce the clamping load.
Where the replacement is made in a fleet workshop, keep the removed part with the vehicle record for one service cycle. The failure mode on the old part is the best evidence available if the warranty terms quoted in the source row, typically 1 to 2 years or 50,000 to 100,000 km, are later discussed.
The source row states a design life of not less than 80,000 km or two years under normal use, with no cracking, no excessive permanent deformation and no stiffness loss. Severe duty or high heat will shorten that, so the inspection interval should be set from the duty cycle rather than from the catalogue figure alone.
It is possible, but pairing is better practice. Two buffers of different age have different stiffness curves, so the cab sits unevenly and one side reaches its stop before the other.
No. Fine surface crazing with correct free height and a correct gap can be cleaned and monitored. Replacement is justified when cracks join into a tear, when the part no longer recovers its height, or when the bond in its sleeve has failed.
Only if the cause is genuinely soft material. A worn mount, a low air charge or a missing spacer will still let the cab reach the stop, and a harder buffer then transfers more shock into the cab structure.
Bonpora Parts and Components supplies cabin buffers and cab mount components for Scania, MAN, DAF, Renault, Mercedes-Benz, BRG and Volvo trucks, together with custom polyurethane parts made to drawing or sample. Start from the commercial vehicle range, read the cabin buffer selection guide, or compare the polyurethane bump stop range. Related suspension content sits under chassis and suspension components, drawing-based work is handled by the custom parts service, and the contact page reaches the technical team directly.