sales@bonporaparts.com
0086-10-64988621
English
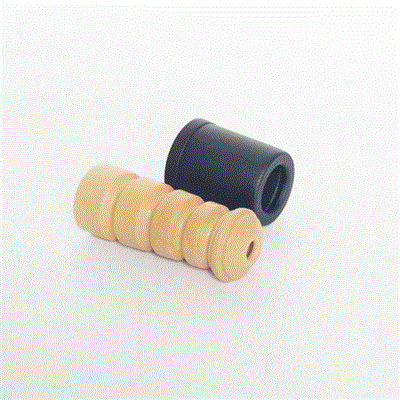
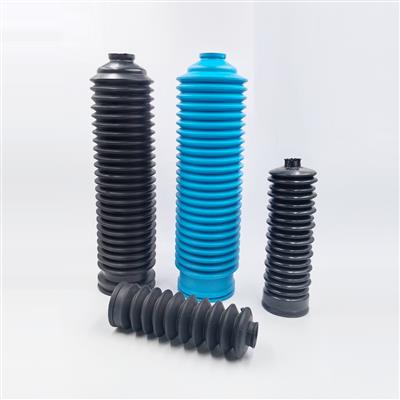
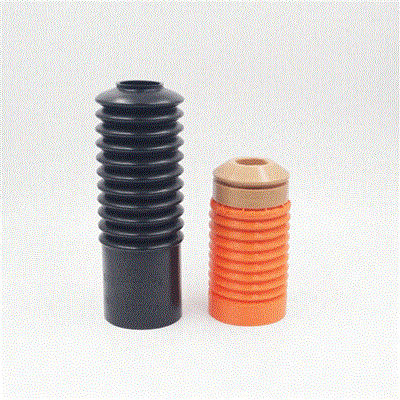
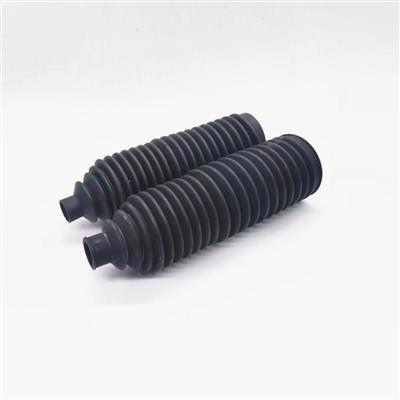
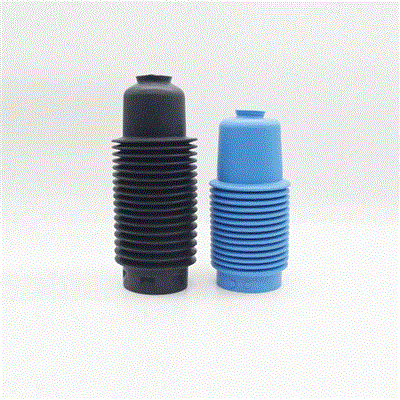
A dust cover, also called a shock dust boot, dust shield or strut bellows, is installed externally on the shock absorber piston rod, positioned above the oil seal. Its upper end mates with the piston rod and its lower end mates with the reservoir cylinder or connecting component. Compounds used in production include EPDM, nylon PA66, PU, NR, NBR and TPE, selected to suit the working temperature and the amount of flex the bellows has to survive.
Functions. It prevents external contaminants such as mud, dust and moisture from reaching the oil seal and the piston rod surface, which avoids scratching of the rod and damage to the seal. It also helps to block high temperatures and UV aging of the parts underneath it.
Service life. Design life of no less than 5 years or 80,000 km without cracking, hardening or deformation failure under conventional environmental conditions.
Quality standard. Manufactured to comply with IATF 16949 system requirements. Test items include hardness, tensile strength, ozone resistance and high and low temperature resistance from -40 C to +100 C.
Warranty. Warranty is provided with the complete shock absorber assembly. When the cover is sold separately, a 1 year or 50,000 km warranty is offered, covering material and manufacturing defects.
Customization. Moulds can be customized from customer supplied mounting dimensions, shape and colour, and different bellows profiles and material hardness adjustments are supported.
Two dampers built from the same dust cover can show very different service life, and the difference is usually in the fitting. A boot that is seated half a rib short at the top, or that is pulled tight against a collar with no free length to compress, will either tear at the first heavy rebound or chafe through where it rubs on the reservoir. Purchasing teams who buy the cover and workshops who fit it therefore need the same reference points: the rod diameter, the two mounting interfaces, and the free length the bellows needs at full extension. This page sets out a practical replacement procedure that can be followed without special tooling beyond normal suspension workshop equipment.
At the top, the cover is held either by its own moulded bead sitting in a groove machined into the piston rod, by a small spring clip, or by a captive collar that is pressed onto the rod. On most passenger car struts the bead or the clip is the retention method, and the cover can be pulled off the rod once the coil spring is compressed and the top mount is released.
At the bottom, the cover either sits in a groove or lip on the reservoir tube, is trapped under a retaining ring, or is held by a moulded inner lip that presses over the tube. A cover that simply hangs loose on the tube is normal on some designs, provided it overlaps the tube by the margin stated on the drawing.
The oil seal and the exposed section of the rod are the two parts that matter. Every grain of road grit that reaches the seal lip is a potential scratch on the rod and a leak path. Keeping the bellows in good order also limits the amount of radiant heat and UV that reaches the seal and the surrounding rubber parts.
| Item | Purpose | Notes |
|---|---|---|
| Coil spring compressor | Release spring load safely | Use a matched pair on opposite coils |
| Torque wrench | Top mount and lower bolts | Confirm the setting in the vehicle data |
| Soft jaw pliers or trim tools | Release clips without scoring the rod | Never grip the rod with bare jaws |
| Lint free cloths | Clean the rod and tube | Keep grit away from the seal |
| Silicone or approved assembly grease | Seat beads and lips | Petroleum grease can attack some compounds |
| Replacement clips or bands | Refit fasteners in new condition | Single use clips should not be reused |
| New dust cover | Correct profile and material | Check the part number against the OE reference |
Fitting a new cover over a damaged rod wastes the part. Before anything is assembled, inspect the exposed rod and the seal area and record the result.
| Check | Acceptable Condition | If It Fails |
|---|---|---|
| Rod surface | Uniform, free of pits, scores and corrosion | Replace the damper unit |
| Rod straightness | No measurable bend over the stroke | Replace the unit, a bent rod will chafe the cover |
| Oil seal lip | No weeping film or wet line below the seal | Rebuild or replace before refitting the cover |
| Upper groove or collar | Sharp edges removed, groove floors clean | Dress with fine abrasive, then clean |
| Lower tube lip | Free of burrs and dried mud | Clean and de burr before seating the boot |
| Existing bellows | No cracks at the folds and no hard spots | Note the failure mode for warranty reporting |
| Mounting Style | Retention | Fitting Rule |
|---|---|---|
| Moulded bead in rod groove | Interference fit in a groove | Bead must sit fully in the groove, no rolling |
| Spring clip on rod | External wire clip | Fit a new clip, check that the gap is even |
| Lower collar or ring | Ring trapped on the tube | Confirm the specified overlap before locking |
| Moulded inner lip | Friction on the tube | Lip must clear the tube edge without folding back |
| Tie band or zip band | Band around the skirt | Cut the tail flush so it cannot chafe the tyre or spring |
The number of ribs and the wall thickness set how far the cover can compress before the folds touch. A cover with too few ribs bottoms out early, which loads the folds in shear and shortens life, while too many ribs on a short stroke leaves the bellows loose and liable to balloon at speed.
As the damper strokes, the internal volume of the bellows changes and air has to move in and out. Many covers have a small vent hole or a loose lip for this reason. If a vent is present, make sure it is not sealed by grease or by a tie band fitted too high, because a sealed cover will inflate and can be blown off the seat.
Check clearance to the spring, the tyre and any brake hose at full bump and full rebound. A cover that touches a spring coil at one point in the travel will wear through at that point long before the rest of the bellows shows any aging.
| Error | Symptom in Service | Correction |
|---|---|---|
| Upper bead rolled during fitting | Cover slips down the rod within a short time | Reseat the bead in the groove, replace if deformed |
| Boot fitted under tension | Torn fold or split near the top within one season | Refit with the correct free length |
| Old clip reused | Cover works loose and chafes the rod | Fit a new clip every time |
| Vent hole greased over | Bellows balloons, then blows off the seat | Clean the vent and refit without excess grease |
| Wrong material for the duty | Hardening and cracking well before the design target | Move to a compound rated for the temperature |
| Cover touching the spring | Localised wear through on one side only | Check profile and routing, refit with clearance |
On road cars, the cover is normally inspected whenever the wheels are off or the damper is serviced. Higher duty cycles need a shorter interval, because heat and grit exposure both rise with load.
| Duty Band | Suggested Inspection | Watch For |
|---|---|---|
| Passenger car, paved roads | At each service or tyre change | Hardening, small splits at the folds |
| Light commercial, mixed roads | Every 20,000 km or 12 months | Grit packed under the lower lip |
| Heavy duty and off road | Every 10,000 km or 6 months | Chafing, missing clips, mud ingress |
| Racing and track use | Every event | Heat cracking and contact damage |
Compound choice drives how long the new cover lasts, so it is worth matching the material to the duty rather than buying on price alone. EPDM is the common general purpose choice for weather and ozone resistance, NBR and NR suit oil contact and general damping work, TPE is used where a soft touch and a precise moulded profile are wanted, PU and nylon PA66 appear on more highly loaded designs where tear strength and dimensional stability matter. Sizing and material details are set out in the existing dust cover range, and the comparison tables in the dust cover material and fitment guide and the dust cover selection and replacement guide cover the compounds and the measurement method in more depth. Because the cover is only one item in the assembly, it is worth checking the condition of the piston rods and the other shock absorber parts at the same time, and reviewing the wider chassis and suspension programme when a fleet is being standardised.
On some designs with a simple bead retention at the top and an open lower lip, the cover can be worked off and replaced with the strut still on the vehicle once the spring load is relieved. Where the cover is trapped under a pressed collar, or where access is tight, removing the strut is the safer route.
The bead should seat fully in the groove with no rolling or stretching of the moulding, and there should be no free play that lets the cover slide down. If the cover can be rotated freely or slides under light hand pressure, the bead or the clip is not seated correctly.
Single use clips and bands should be replaced whenever the cover is changed. A clip that has lost its tension may look correct on the bench but release under vibration, and a loose cover will chafe the rod and the seal.
The usual causes are a bead that was rolled during fitting, a boot installed under tension rather than at its free length, the wrong compound for the operating temperature, or contact with the spring or another component at some point in the travel. Checking all four points before the next fit prevents a repeat.
Bonpora Parts supplies dust covers and shock dust boots moulded in EPDM, NBR, NR, PU, TPE and nylon PA66, with the bead dimensions, bellows profile and hardness recorded on the drawing for each part number. If you are working to a replacement schedule, send the rod diameter, the two mounting dimensions and the free length you need, and our engineers will match an existing tool or quote a new one. A trial batch with a hardness and low temperature test report keeps the first release decision straightforward. Start from the dust cover range, review custom moulded parts for a new profile, or contact our team with your specification and annual volume. Additional part references are listed on the products page.