sales@bonporaparts.com
0086-10-64988621
English
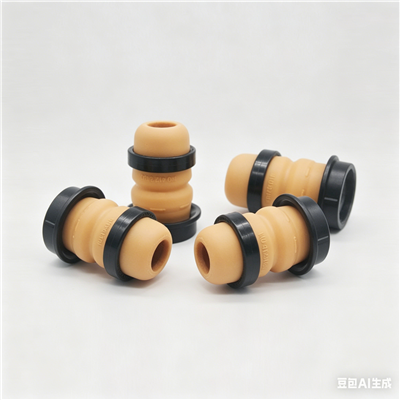
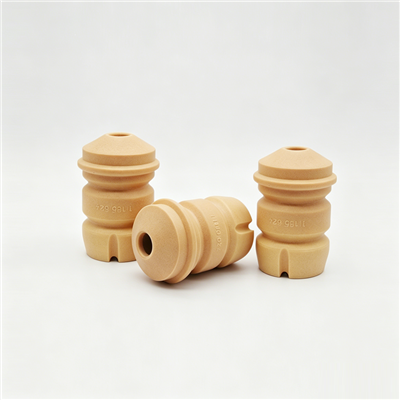
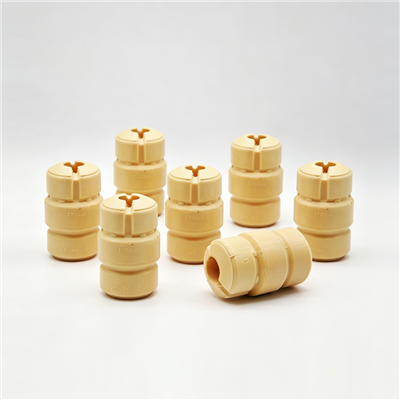
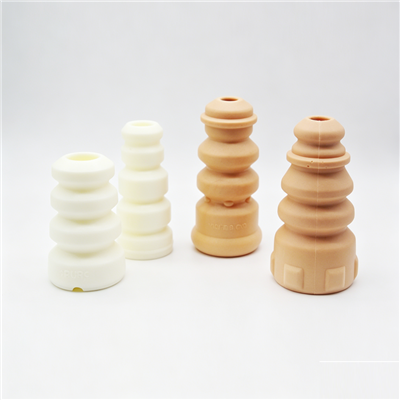
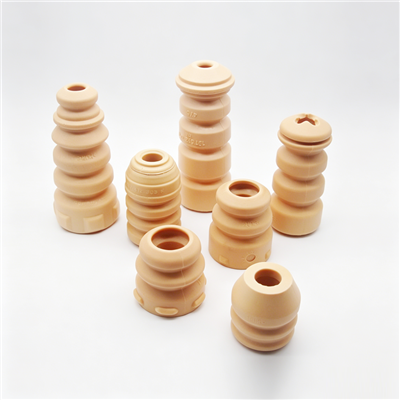
A jounce bumper, also known as a bump stop, bump rubber, rubber buffer or strut bumper, is an elastic component typically made of high elasticity polyurethane in an MDI or NDI system. It is installed on the piston rod of a shock absorber to provide progressive auxiliary stiffness at the end of the suspension compression stroke, and it is one of the few suspension parts whose failure is defined entirely in material terms rather than by a noise or a leak.
Bonpora states a design life of at least 80,000 km or 2 years under normal use, and defines the end of that life with three conditions: cracking, excessive permanent deformation, and stiffness loss. That definition is unusually useful for a workshop, because each of the three conditions can be checked with the part in the hand and each produces a different symptom on the road.
Cracking is a structural failure of the material. Excessive permanent deformation is a geometric failure, because the bumper has lost the height that sets the point at which it engages. Stiffness loss is a performance failure, because the part is present and intact but no longer adds the resistance the suspension was designed around. A bumper can fail in one of the three and pass the other two, which is why replacing on the basis of visual appearance alone regularly misses a part that has gone soft.
The qualifier under normal use is significant. A bumper that is asked to carry load continuously, for example on a vehicle with a sagged or broken coil spring, a vehicle that is consistently overloaded, or a damper that has lost its gas charge so the suspension sits lower, is being used as a spring rather than as an end stop. In those conditions the part takes a set and cracks early regardless of its quality, and replacing the bumper without correcting the cause produces the same failure on the same schedule.
Cracks most often begin where the section changes fastest, at the root of a rib, at the base of a waist, or at the interface between the bumper and its washer or plate. These are the locations where the compressive load turns into a tensile strain at the surface as the profile bulges outward. A crack that starts at a moulding flash line or a knit line is a production defect, while a crack that follows the bulge pattern is a service failure.
The distinction matters when a claim is being assessed. A crack that follows a visible flow line, that contains entrapped gas voids at its root, or that appears on a part with few road kilometres is a manufacturing issue. A crack that is surrounded by polished, worn material, that has propagated from the outer surface inward, or that is accompanied by other ageing marks has developed in service.
| Crack type | Appearance | Likely origin |
|---|---|---|
| Knit line crack | Straight, follows a visible flow line | Moulding condition |
| Root crack at a rib | Curved, follows the bulge pattern | Service load and fatigue |
| Surface crazing | Fine network across the whole surface | Ageing and exposure |
| Split at the base | Radial tear at the washer interface | Misalignment or over compression |
| Cut or gouge | Sharp edges, localised | Debris or fitting damage |
Compression set is the part of the deformation that does not recover when the load is removed. Cells of cast polyurethane that have been compressed for long periods adopt a new shape, and the bumper comes back shorter than it was. Since the engagement point of the bumper is set by its free height, a shorter bumper engages later and the suspension travels further before the progressive resistance begins.
Set is driven by temperature, by load and by time under load. A bumper working near the top of its temperature range under continuous load will set faster than one that is lightly used in a temperate climate. This is one reason to review the spring and damper condition as part of a bumper diagnosis rather than treating the bumper as an isolated item.
| Observation | Assessment |
|---|---|
| Free height close to released dimension | Set within normal range |
| Visible height loss, part recovers in minutes | Early set, monitor |
| Height loss that does not recover after removal | Excessive permanent deformation, replace |
| Part compressed to a fraction of free height | Replace and check the spring and damper |
A soft bumper is felt over broken surfaces and speed humps rather than on smooth roads. The driver typically reports that the car reaches a hard limit sooner than before, that the rear end feels as though it runs out of travel, or that a thud has returned over the same road that used to be absorbed. The part looks normal on the ramp, which is why it is often missed.
The practical bench check is to compress the bumper against a load figure and compare the resulting height with a new part. If a known load compresses the used part further than a reference unit, the stiffness has fallen. Comparing static stiffness curves is the formal version of the same check, and it is the measurement the Bonpora inspection system already records for every production lot.
The bumper sits on the rod, so a worn guide bush or a bent rod loads it off centre. The result is an uneven contact pattern, more heat on one side, and a set or crack that appears on one side only.
A collapsed upper mount reduces the clearance available to the bumper, and a dust boot that has broken away exposes the bumper to grit and to prolonged UV. Both conditions shorten life without the bumper itself being at fault.
A spring that has sagged lowers the static ride height, which brings the bumper into contact during ordinary driving rather than only at the end of the stroke. The bumper then behaves as a spring and is worn from the moment the vehicle is loaded.
| Symptom | Suspect part | Evidence to collect |
|---|---|---|
| Uneven wear pattern on the bumper | Rod, guide bush, upper mount | Dial gauge on the rod, mount condition |
| Bumper cracked on one side only | Misalignment | Contact pattern photograph |
| Bumper set with normal road miles | Spring sag or overload | Ride height measurement |
| Bumper surface heavily abraded | Broken dust boot or missing shield | Boot and guard condition |
| Repeated failure at the same axle | Damper, spring or mount fault | Compare both sides of the axle |
| Step | Check | What it proves |
|---|---|---|
| 1 | Measure static ride height on both sides | Whether the spring or damper has dropped the body |
| 2 | Inspect the bumper for cracks and for contact pattern | Whether failure is even or one sided |
| 3 | Compress the bumper by hand and release | Whether it returns and how stiff it feels |
| 4 | Remove and measure free height | Whether permanent deformation is excessive |
| 5 | Compare against a reference part under the same load | Whether stiffness has dropped |
| 6 | Check the rod, guide bush, mount and boot | Whether a cause upstream is present |
A bumper that has lost height or stiffness allows the suspension to travel further before any progressive resistance is added. The consequences follow in sequence: more frequent metal to metal contact at the end of the stroke, more load into the top mount and the body structure, more noise, and a harsher ride on the impacts the bumper was designed to soften. On a vehicle that is used loaded or on poor roads, the additional travel also changes the geometry at the extremes of suspension movement, which is where tyre and wheel arch contact can occur. None of these outcomes is immediate, which is exactly why the failure is often allowed to continue.
Front and rear bumpers on the same axle have covered the same distance and the same conditions, so a bumper that has failed on one side is usually matched by a part on the other side that is part way through the same process. Replacing both sides of the axle in one job restores a symmetrical engagement point and avoids a second strip down within a short interval. Where only one side is clearly failed, check the other side on the bench before deciding, because a difference in loaded height between the two sides is the first sign of a developing fault.
The Bonpora row for this profile lists references across four brand families, reproduced below. Use them as the starting point for a cross reference and confirm the number against the removed part, because a near miss between two adjacent profiles produces a bumper that fits but does not behave correctly.
| Brand family | References listed on the Bonpora row |
|---|---|
| Volkswagen, Audi, Skoda, Seat | 4G0512131D, 7L8412303, 6Q0512131D, 7P0411177, 7P6412303B, 7P6512131B, 7N0511359, 8R0412131D, 8K0512131, 8K0512131A, 5N0511359F, 5QD412303 |
| BMW, Mercedes Benz, Opel, Volvo, Porsche, Citroen | A2043210106, A2043210306, A2053211706, A2053211606, A2053211506, A2113230444, A2123210106, A2123210306, A1563210006, A2013232044, E4-AP2-Z075A0, A2133211200, A4473211106, A1673210306, LROO1144, LR001137, LR061353, LR121033, T4N12627, T4N7370, A6393240206 |
| Honda, Toyota, Lexus, Mazda, Mitsubishi | 48341-30130, 48341-48050, 48331-12220, 48341-32053, 52722-SS0-003, 52722-SWA-A01, 51722-SFE-003, 51722-SV4-004, 51722-SAA-E02, 20371-FC000, 48331-AB010, MR961189, 54050HV10A, 54626-4H000, 54626-A9000, 55326-D3000, 44318-34000, 551513E000, 55326-1M000, 54626-3X000 |
Quality is controlled under an IATF 16949 system, with inspection of the static stiffness curve, compression set, hardness and appearance, and the typical warranty is 1 to 2 years or 50,000 to 100,000 km. Because those four inspection items map directly onto the three failure conditions, a claim is best supported by the same evidence a workshop would collect anyway: the mileage at fitting, the batch code, the measured free height of the returned part and, where the complaint is about ride quality, a note of the loaded height compared with a reference part.
Look at the direction and the surroundings of the crack. A service crack follows the bulge pattern of the profile, has polished or worn material around it, and usually appears after a substantial mileage. A moulding defect follows a flow or knit line, may contain voids at its root, and can appear on a part with very few kilometres on it.
Yes. Stiffness loss and permanent deformation both leave a bumper that looks intact. A part that has gone soft or that has lost height will no longer add the progressive resistance it was designed around, so the vehicle reaches a hard limit sooner and the ride worsens over large impacts. Compressing the bumper by hand and measuring its free height reveals both conditions.
It can contribute. Without progressive resistance, more load reaches the top mount and the body structure at the end of the stroke, and the suspension travels further than intended. The usual pattern in a repair is that the bumper, the dust boot and the upper mount are all replaced together, because they share the same working environment and the same consequences.
It is the normal practice, because both sides have covered the same distance and conditions. A difference in loaded height between the two sides of an axle is the first sign that the second part is not far behind the first, and replacing both in one job avoids a second strip down shortly afterwards.
Bonpora produces jounce bumpers in high elasticity polyurethane MDI and NDI systems for shock absorber piston rods, providing progressive auxiliary stiffness at the end of the compression stroke, absorbing impact energy, reducing noise and load from metal to metal contact, and improving ride comfort under large impacts, with a -40°C to +90°C working range and a design life of at least 80,000 km or 2 years under normal use. Start from the on road range, review the selection criteria in the jounce bumper specification guide, compare related stops in polyurethane bump stops, check the axle parts in chassis and suspension, and send your reference numbers through the contact page.