sales@bonporaparts.com
0086-10-64988621
English
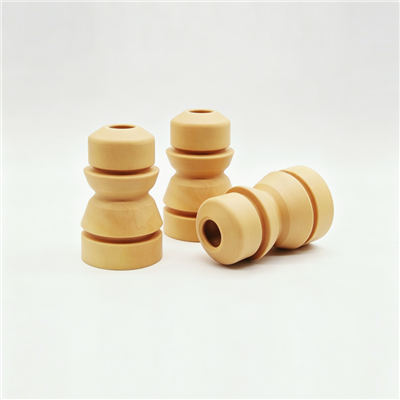
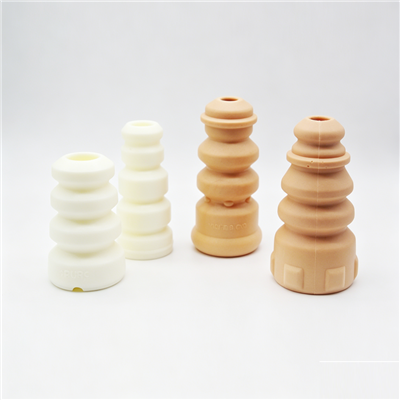
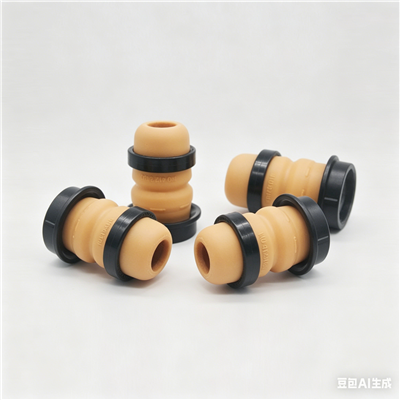
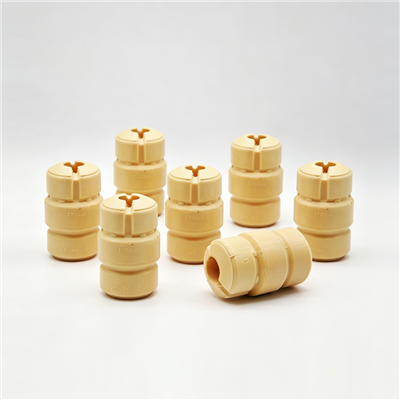
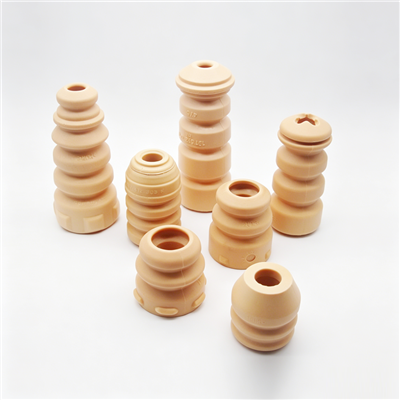
A jounce bumper, also known as a bump stop, bump rubber, rubber buffer or strut bumper, is an elastic component typically made of high elasticity polyurethane in an MDI or NDI system. It is installed on the piston rod of a shock absorber to provide progressive auxiliary stiffness at the end of the suspension compression stroke, and it works together with the damper, the coil spring and the upper mount to control the last part of the travel.
Fitting one is a strut strip down rather than a bolt on job. That has two consequences. The first is that the bumper is normally renewed while other parts of the same assembly are being replaced, so the job should be planned as a group rather than as a single item. The second is that the assembly contains a compressed spring, so the work carries a real risk of injury if it is carried out without the correct equipment and procedure. The sequence below assumes a workshop with suitable spring compression equipment and a technician trained to use it.
The bumper sits on the piston rod, between the damper body and the upper mount, usually inside or immediately below the dust boot. Its height and its position set the point at which it begins to be compressed, so its seat and its relationship to the boot and the mount matter as much as the part number does.
The coil spring holds the mount, the bumper and the boot in place under load. Releasing that load without controlled compression is the main hazard in the job. Use the correct compressor for the spring diameter, check the claws and the threads before use, compress evenly on opposite sides, and never use an impact tool on a compressor that is not rated for it.
| Item | Why it is needed |
|---|---|
| Confirmed reference number | Several bump stop profiles are visually similar |
| Vehicle ride height figures | Baseline for the post fit check |
| Torque figures for the strut fixings | Mount nut and strut to body fasteners |
| New dust boot where required | Protects the new bumper from grit and UV |
| Upper mount and bearing condition | Frequently replaced in the same job |
| Damper condition assessment | A failed damper will finish the new bumper early |
Confirm the reference on the removed bumper, the moulded markings and the vehicle data before the replacement is fitted. Where the reference is being resolved from a cross reference, compare the free height and the profile of the new part with the old one, allowing for any set the old part has taken. A difference in profile that is visible side by side is a difference in stiffness behaviour.
Measure static ride height on both sides before the work begins. If one side is already lower, the cause is usually the spring or the damper rather than the bumper, and fitting a new bumper without addressing it will not restore the ride. The measurement also gives a baseline for the check after reassembly.
| Tool | Use |
|---|---|
| Spring compressor rated for the spring | Controlled release of spring load |
| Torque wrench | Mount nut and strut fasteners |
| Ride height gauge or tape | Before and after measurement |
| Straight edge and calliper | Bumper free height and profile check |
| Inspection light | Boot, mount and bumper seat inspection |
| Clean rags and compatible cleaner | Seat and rod preparation |
A straight edge and a calliper are enough for the bumper checks. Measure the free height of the old part before it is discarded, because that figure is the single most useful comparison when a complaint about ride quality follows the repair, and because it explains how much the old part had deformed.
Raise and support the vehicle correctly, remove the wheel, and release the strut fixings following the vehicle manufacturer instructions. Note the position of any locating marks on the mount before dismantling, so that the assembly can be returned to the same orientation.
Compress the spring evenly until the mount is free, then release the mount nut fully with the spring still held. Keep the assembly square in the compressor throughout. Never release the nut with the spring at its free length.
Slide the bumper off the rod and retain it for inspection. Check whether it has taken a set, whether it has cracked, and whether the contact pattern is even. That inspection decides whether the job is a straightforward renewal or whether an underlying fault should be corrected at the same time.
| Component | Check | Action if out of condition |
|---|---|---|
| Damper rod | Straightness, scoring, oil film | Replace the damper |
| Dust boot | Cracks, splits, retention | Replace with the bumper |
| Upper mount and bearing | Collapse, roughness, rubber condition | Replace as an assembly |
| Coil spring | Breaks, corrosion, free length against spec | Replace as a pair |
| Bumper seat and washer | Deformation, corrosion, burrs | Rectify before fitting the new part |
Clean the seat and the rod, then fit the bumper fully home on its seat without twisting it. Confirm that any retaining feature, washer or shoulder is engaged as designed. Do not modify the bumper to make it fit, and do not cut or trim it; the correct part is the one with the right bore, height and profile.
Refit the dust boot so that it covers the bumper without pressing on it, and so that it cannot trap between the bumper and the mount at full compression. A boot that is seated on the bumper rather than around it loads the material in the wrong direction and shortens its life.
Reassemble in reverse order with the spring compressed, seat the mount correctly, then tighten the mount nut to the specified figure with the spring still compressed and the assembly square. Release the compressor slowly once the assembly is fully secured, and check that the spring has seated in both the upper and the lower seats.
| Check | What is being confirmed |
|---|---|
| Ride height, both sides, compared with the baseline | The assembly is seated and the spring is correct |
| Bumper visible position on the rod | Correct seating and orientation |
| Boot condition and fitment | Bumper is protected from grit and UV |
| Torque of all released fasteners | Joint security |
| Road test over broken surfaces | No contact noise, no repeat thud |
| Record of mileage, batch code and measurements | Future reference and warranty evidence |
| Error | Symptom afterwards | Correction |
|---|---|---|
| Bumper not fully seated | Later engagement, possible noise | Strip down and reseat |
| Bumper turned or twisted on the seat | Uneven contact, early set | Refit squarely |
| Boot pressing on the bumper | Localised wear or cracking | Refit the boot around the bumper |
| Old bumper reused after a set | Ride complaint returns quickly | Fit a new part |
| Spring not seated correctly | Noise and incorrect ride height | Recompress and reseat |
| Wrong profile for the reference | Fits but rides differently | Match the confirmed reference |
The Bonpora row for this profile lists references across four brand families, reproduced below as a cross reference starting point. Confirm the number against the removed part and the vehicle data before fitting.
| Brand family | References listed on the Bonpora row |
|---|---|
| Volkswagen, Audi, Skoda, Seat | 6U9412303, 4B0512131N, 6N0412303A, 6Q0412301, 1K0412303B, 1K0511353P, 3C0511359, 3B7412377A, 1H0412303B, 1J0512131, 96494604, 377412131 |
| BMW, Mercedes Benz, Opel, Volvo, Porsche, Citroen | 31331140140, 31360451, 9140067, 30635296, 31336771352, 31302290313, 31331096298, 33506757368, 31336764086, 1293230744, 2463210206, 2053211606 |
| Honda, Toyota, Lexus, Mazda, Mitsubishi | 52722-S9A-014, 48341-32052, PW-861069, PW922931, 48331-33032, 48331-28050, 48331-52100, 48331-33030, 51722-SWA-A02, KR11-28-111 |
| Chevrolet, Fiat, Jeep, Chrysler, Dodge | 96549925, 96403109, 93BB5K570AC, 84153144, 96859128, 523065, 51941991, 1780533, 51939952, 68063781AE, 1307842 |
Quality is controlled under an IATF 16949 system, with inspection of static stiffness curve, compression set, hardness and appearance, and the typical warranty is 1 to 2 years or 50,000 to 100,000 km.
On most strut suspensions the bumper sits on the piston rod inside the spring, so the assembly has to be removed and the spring compressed to reach it. A small number of designs place a separate stop on the body or the arm, and those can be reached with the vehicle raised. Confirm the arrangement for the specific vehicle before quoting the job.
It is good practice. The boot shares the same environment and the same strip down, and a worn boot lets grit and UV reach the new bumper immediately. If the boot is cracked or its retention has failed, replacing it with the bumper costs a fraction of a second strip down later.
Once the spring is correctly seated, all fasteners are torqued and a road test over broken surfaces has confirmed that there is no contact noise and no repeat thud. Measure ride height before and after, because a difference between the two sides points to a seating or spring problem rather than to the bumper.
It is the usual practice where both sides have covered the same distance, because the second part is normally part way through the same wear. Where only one side is clearly failed, check the other on the bench and compare loaded height, so that the decision is based on measurement rather than on appearance.
Bonpora produces jounce bumpers in high elasticity polyurethane MDI and NDI systems for shock absorber piston rods, providing progressive auxiliary stiffness at the end of the compression stroke, absorbing impact energy, reducing noise and load from metal to metal contact, and improving ride comfort under large impacts, with a -40°C to +90°C working range and a design life of at least 80,000 km or 2 years under normal use. Start from the on road range, review the selection criteria in the jounce bumper specification guide, check the wear patterns in the jounce bumper failure analysis guide, compare related stops in polyurethane bump stops, and send your application details through the contact page.