sales@bonporaparts.com
0086-10-64988621
English
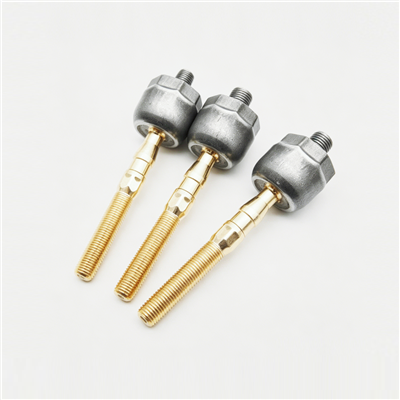
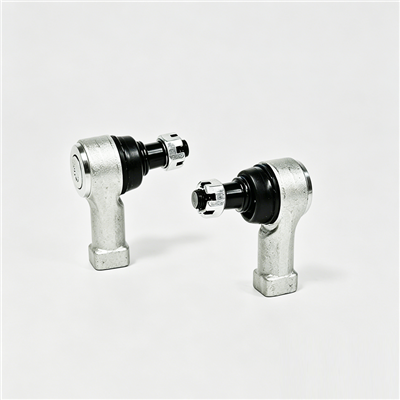
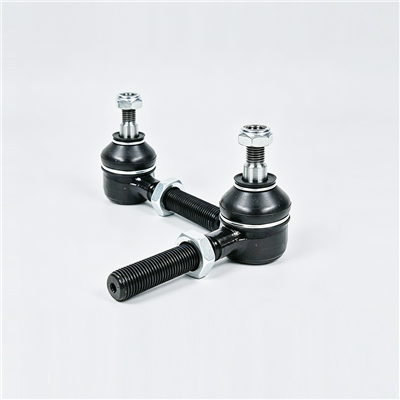
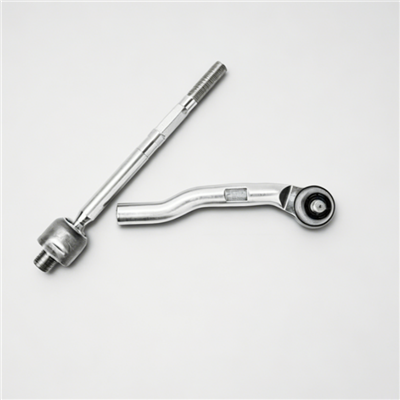
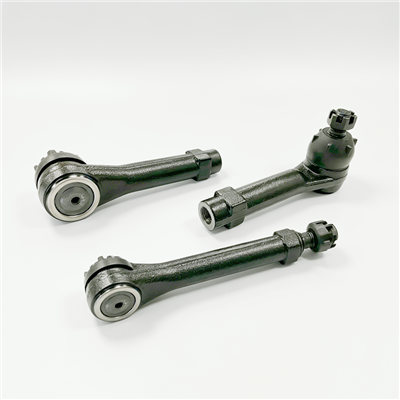
A tie rod, also named steering linkage, track rod, drag link or steering tie rod end, connects the steering gear or steering arm to the steering knuckle arm. It transmits steering torque to drive the wheels to turn, and its length is adjusted during wheel alignment to set the toe angle.
The rod body is made of carbon steel or aluminium alloy, while the end ball joint is made of alloy steel with a surface hardened finish. That combination explains the failure pattern: the rod body rarely fails, and the joint at the end is where wear, contamination and looseness develop. A diagnosis that treats the assembly as one part usually ends up replacing more than the vehicle needs.
Two jobs are carried out at the same time. The rod has to carry a compression and tension load without changing length, and it has to allow the knuckle to move through suspension travel and steering angle without transmitting a bending moment into the joint. The joint therefore uses a hardened ball in a socket, sealed by a dust cover, and it is the seal that keeps the joint working for its intended life.
Wear in a tie rod falls into two families with different causes. Joint wear is mechanical and progressive: the socket develops play, the ball moves further than designed, and the driver starts to notice steering feel and tyre wear. Impact or adjustment damage is acute: a bent rod, a stripped thread or a jammed adjuster. The first family is the common one, and it is what the inspection items are designed to catch.
Bonpora inspects ball joint torque, axial play, dust cover sealing and overall tensile strength, and offers a 1 year or 30,000 km quality guarantee covering ball joint wear or looseness. Each item answers a different question.
| Inspection item | What it verifies | What a buyer or workshop should ask |
|---|---|---|
| Ball joint torque | The joint moves with the intended resistance rather than freely or too stiffly | Torque range and how it is measured on the finished part |
| Axial play | End float in the socket is inside the limit before the part is fitted | Play limit and the method used to measure it |
| Dust cover sealing | The seal keeps water and grit out of the joint over service life | Cover material, retention method and any pressure or immersion test |
| Tensile strength | The assembled rod carries the steering load without separating | Test load and pass criterion for the finished assembly |
Axial play and torque describe the joint as it leaves the factory. Sealing describes how long that condition will last. Tensile strength describes the worst case. A workshop checking a used part on a vehicle can only assess the first two directly, so a joint with acceptable play but a split dust cover is a joint that will fail, and it should be treated as a replacement item rather than as a watch item.
| Symptom | Likely source | Confirming check |
|---|---|---|
| Clunk when turning the wheel at a stand | Play in the outer tie rod end joint | Load the joint by hand and feel for movement while a helper turns the wheel |
| Vague steering with a small dead band | Play in the inner joint or the rack end | Grab the inner joint and push and pull along the rod axis |
| Uneven or feathered front tyre wear | Toe setting changed, often after a worn joint | Check toe before and after any joint replacement |
| Shimmy or vibration at a narrow speed band | Joint play combined with wheel balance or run out | Test each wheel for balance and run out before condemning the rod |
| Grease or water escaping from a joint | Dust cover split or displaced | Inspect the cover on both ends and check for a twisted fit |
| Steering that pulls after an alignment | Adjuster sleeve not locked, or thread damaged | Check the adjuster clamp and count the exposed threads on both ends |
Most vehicles have an inner joint at the rack or the drag link and an outer joint at the knuckle. A helper turning the steering wheel gently while the front is raised, with a hand on each joint in turn, is the quickest way to identify which one has play. Only the joint that moves is worn; replacing both because the assembly was ordered as a unit is a cost the customer did not need.
A worn wheel bearing, a loose wheel, a worn control arm bushing, a stabilizer bar drop link or an anti-roll bar problem can all produce a clunk in the same area. Each is cheap to test and each is a common cause of a tie rod being replaced without the complaint going away. Test the wheel bearing for play and noise, and check the drop links with a pry bar before ordering steering parts.
The dust cover is the smallest and cheapest part of the assembly, and it decides the life of the most expensive part. Once the cover is split, displaced or twisted, water and abrasive grit reach the ball and socket, the lubricant is displaced, and the joint wears at a rate no inspection before fitting would have predicted.
Covers fail from ageing and ozone attack, from mechanical damage during fitting, from being twisted when the joint is tightened, and from contamination by fuel or solvent. A cover that has been fitted with a twist fails early even if the material is correct, which is why the fitting practice of holding the ball stud while tightening the nut matters.
On a joint that is otherwise sound, a damaged cover is still a reason to plan a replacement, because the wear has already begun internally and cannot be reversed. Where a cover is intact, keep it that way: do not use a hammer on a joint, do not lever on the cover, and do not use solvent near it.
Repeat the checks with the suspension loaded where access allows, because some joints only show play under load. Record what was found and on which side, so the next service can tell whether the condition is progressing.
A joint with play beyond the released limit, a joint with a compromised dust cover, a bent rod, a damaged thread, or a joint that has become loose after adjustment are all replacement cases. Steering joints are safety relevant, so any measurable looseness is treated as a replacement rather than as a condition to monitor.
An adjustable rod is also the toe setting mechanism, which means any replacement changes the toe angle. Count and record the exposed threads before removal, set the new rod to the same length as a starting point, and measure toe afterwards rather than assuming the setting has been preserved. On vehicles with adjustable aftermarket rods, confirm the adjustment range suits the ride height and the alignment specification in use.
Both joints on one side, and both sides of the axle, have covered the same distance. When one end shows measurable wear, check the others before deciding, and if two are worn, replace them as a set and carry out an alignment once. That is cheaper than two separate repairs and one avoidable tyre wear complaint.
Bonpora offers a 1 year or 30,000 km quality guarantee covering ball joint wear or looseness. That term is specific to joint condition, so the evidence that matters is the same evidence a workshop should record anyway: the part number and batch, the mileage at fitting, the alignment reading taken after fitting, and the mileage and condition at the time of the complaint.
A claim supported by a record showing the alignment was set after fitting is straightforward to assess. A claim with no alignment record is harder, because incorrect toe after a replacement loads the joint continuously and wears it out early, and that is an assembly issue rather than a part issue. Two habits therefore protect both sides: record the alignment figures on the job sheet, and keep the batch code from the packaging.
By loading the joint in the direction the road loads it and feeling for movement, with a helper turning the steering wheel through a small arc. Axial play is checked by pushing and pulling the inner joint along the rod axis. Play beyond the released limit is the deciding factor, not the age of the part.
Yes. The tie rod is the toe adjustment mechanism on most vehicles, so replacing it changes the toe angle. Setting the new rod to the same length as the old one is a starting point, not a substitute for measuring the alignment afterwards.
It is not an immediate safety issue, but it is a predictable failure. Once a cover is split, water and grit enter the joint and wear accelerates, so the joint should be planned for replacement rather than monitored indefinitely.
Check all of them and replace the ones that show measurable wear, preferably as a set per side so that only one alignment is required. If one joint is clearly worn, the others have covered the same distance and commonly are not far behind.
Bonpora produces tie rods with carbon steel or aluminium alloy rod bodies and surface hardened alloy steel ball joints, inspected for ball joint torque, axial play, dust cover sealing and overall tensile strength, and offers customization of length, end connection threads and ball joint sizes for OE replacement or adjustable aftermarket use. Start from the tie rod range, review the technical detail in the steering tie rod specification guide, check the rest of the axle in the chassis and suspension range, match the surrounding parts through mounting bushings and stabilizer bars, and send your application data through the contact page.