sales@bonporaparts.com
0086-10-64988621
English
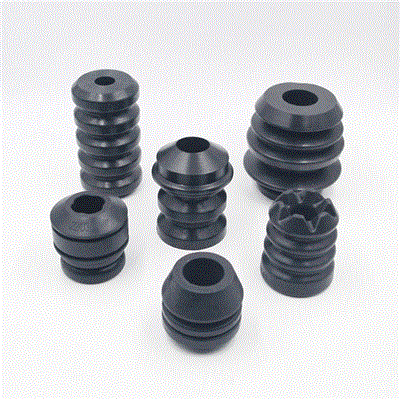
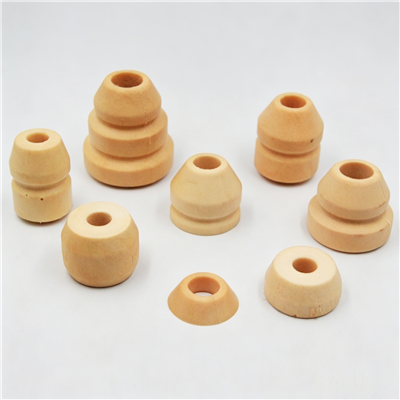
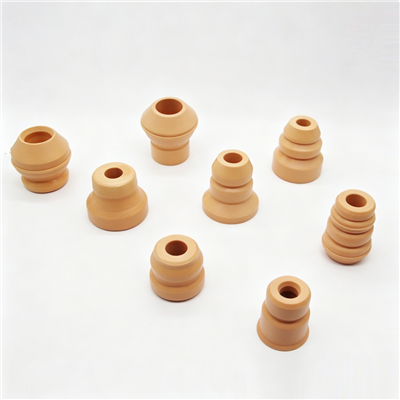
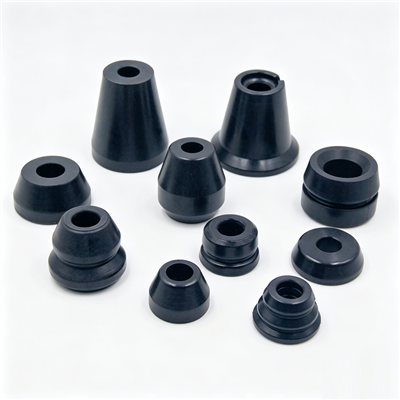
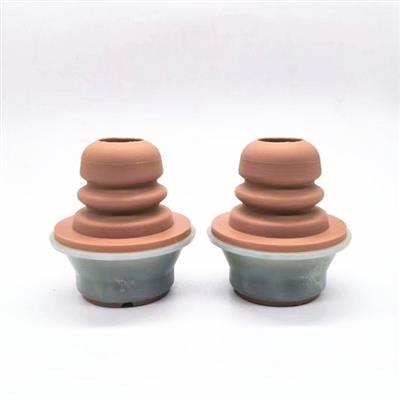
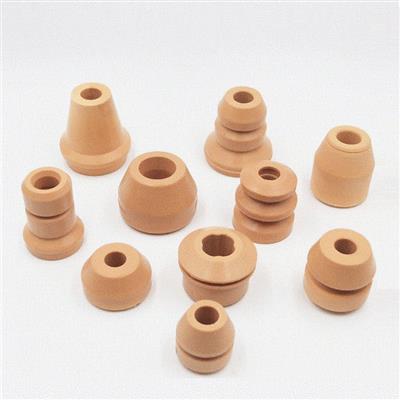
The jounce bumper described in the Bonpora source row is an elastic component typically made of high-elasticity polyurethane using MDI or NDI chemistry. It is fitted into the suspension damper of off-road vehicles such as SUVs, pickups and race cars, and on motorcycles and motorsport vehicles. It is also known as a bump stop, bump rubber, rubber buffer or strut bumper.
The part itself is simple, so the quality of the job depends almost entirely on preparation. The bumper has to be matched to the travel the suspension actually has, positioned so that it contacts at the right point in the stroke, and fitted in a clean assembly so that it is not damaged by grit or by a burr on the shaft.
Its duties, as listed in the source row, are to provide progressive stiffness during significant suspension compression, to absorb high-impact energy in extreme conditions such as jumps and rough terrain, and to protect the shock absorber and the frame from metal-to-metal contact. A bumper that contacts too early takes that protection away from the damping range; one that contacts too late never does its job.
| Category | Item | Purpose |
|---|---|---|
| Support | Rated stands or a lift, wheel chocks | Hold the vehicle at ride height and at full droop |
| Measuring | Tape, straight edge, vernier or caliper | Travel and gap measurement |
| Damper work | Spring compressor, shaft clamp with soft jaws | Strip and rebuild safely |
| Cleaning | Lint-free cloth, approved cleaner, low pressure air | Clean shaft and seat before assembly |
| Consumables | New seals or oil as the damper requires, assembly lubricant | Complete the job in one pass |
| Inspection | Side light, marker pen, camera | Record shaft and pad condition |
Do not compress a coil spring without a rated compressor, and never clamp a damper shaft in a vice without soft jaws. A scored shaft will destroy the seal within a short distance.
Remove the spring or otherwise take the spring load off the damper, then raise the suspension until it stops. Measure the distance between the two points that the bumper will work between. This is the space the bumper has to fit into at full bump, and it is the number that decides whether a part will extrude.
Let the suspension hang to its limit and measure the same distance. The difference between full droop and full bump is the total travel available.
Set the vehicle to its normal ride height, with the normal load on board, and measure the gap once more. This is the gap the bumper sees for most of its life, and it is the number a driver feels as ride quality at the limit.
Recording all three figures before the bumper is chosen is what makes the selection defensible. On a modified vehicle, the travel available at full bump is often shorter than the original specification, which is exactly the condition that leads to extrusion.
| Requirement | Choice | Result |
|---|---|---|
| More usable travel, softer limit | Shorter bumper or a larger gap | The stop is reached later in the stroke |
| Stronger end-of-travel control | Longer bumper or higher hardness | Force rises earlier and more sharply |
| Protection of a long-travel damper | Bumper sized to the remaining shaft length | No metal-to-metal contact at full bump |
| Competition setup with limited travel | Profile matched to the strike pad | Predictable behaviour at the limit |
Where the required length is not available as a catalogue item, the source row notes that customisation is accepted against customer-provided modification travel, stiffness requirements and mounting dimensions, working from a sample or a drawing.
Compress the spring with a rated tool, release the top mount, and remove the spring so that the damper can be worked on without stored energy. Keep the components in the order they came off.
Wipe the shaft with a lint-free cloth and check for score marks, corrosion pitting or a bend. A bumper fitted over a damaged shaft will not run true, and the shaft damage will shorten the life of the seal.
Look at the face the bumper contacts. A deformed or polished pad indicates a hard stop history and should be renewed or dressed before the new part is fitted.
Slide the bumper onto the shaft in the orientation shown for the damper, with any washer or sleeve below it in the correct order. Use the approved assembly lubricant sparingly, and keep grit away from the shaft.
Refit the spring, the seats and the top mount, and bleed the damper if the design requires it after being inverted. Set the spring preload to the intended ride height rather than to the previous mark, because the new bumper may change the point at which the suspension stops.
With the vehicle on the ground at normal load, measure the gap between the bumper and its contact face and compare it with the figure recorded before the job. Correct anything that is outside the intended range before the vehicle is driven.
Where the stop is mounted on the chassis or the axle rather than inside the damper, the sequence is different. Check the mounting face for distortion and for cracks around the bolt holes, and confirm that the stop is square to the pad it contacts. A stop that meets its pad at an angle wears on one edge and can be extruded sideways even though its free height is correct. Check also that the hardware cannot become the contact point under a heavy landing, and use the specified fasteners rather than long bolts that protrude into the travel.
On a motorcycle the bumper works within a much smaller travel, so small changes in free length have a larger relative effect. The source row quotes a shorter design life for this application, no less than 3 years or 30,000 km, which reflects the higher cycle rate and the smaller section. Where the design uses the stop to limit chain contact under full compression, check the clearance after assembly and not only the travel.
| Check | Method | Record |
|---|---|---|
| Gap at ride height | Measure both sides of the vehicle | Value before and after the job |
| Full bump clearance | Compress to the stop slowly and look | No metal-to-metal contact |
| Bumper location | Confirm it is seated square on the shaft or mount | Pass or fail |
| Fastener torque | Re-check after the first run | Value applied |
| Contact pattern | Inspect the pad after the test run | Even pattern, no edge loading |
Run the vehicle over the kind of surface it is built for, then inspect the contact pattern on the strike pad. An even pattern confirms that the bumper is meeting its pad square. A pattern concentrated on one edge points to a misalignment that will shorten the life of the part.
| Error | Consequence | Correction |
|---|---|---|
| Bumper chosen without measuring full bump | Extrusion or no end-stop protection | Measure travel first, then select |
| Dirt or grit left on the shaft | Seal damage and premature leakage | Clean and reassemble |
| Spring preload set to the old mark | Wrong gap and wrong contact point | Set ride height, then measure |
| Stop fitted at an angle | Edge wear and possible extrusion | Refit square to the pad |
| Only one side of the vehicle changed | Uneven behaviour at the limit | Fit the same reference on both sides |
| No gap measurement recorded | No baseline for the next service | Record the value in the vehicle file |
Measure full bump, full droop and the gap at ride height first. The bumper should protect the damper at full bump without contacting so early that it takes away usable travel. Where no catalogue length fits, the part can be made to the measured travel and mounting dimensions.
On an external stop, yes. On a shaft-mounted stop the assembly normally has to be taken apart, because the bumper has to pass over the end of the shaft.
There is no single figure, because it depends on the damper, the spring rate and the intended use. It should be set so that the bumper contacts before the damper runs out of travel, and checked by measuring both sides of the vehicle at normal load.
Not automatically, but the damper should be inspected at the same time. A damper with a scored shaft, a leaking seal or a lost gas charge will keep driving the suspension onto the stop and will shorten the life of any new bumper.
Bonpora Parts and Components supplies jounce bumpers and polyurethane suspension buffers for off-road vehicles, race cars and motorcycles, and produces custom parts to sample or drawing. Start from the off-road vehicle range, read the jounce bumper selection guide and the failure analysis article, or compare the polyurethane bump stop range. Drawing-based projects use the custom parts service, related content sits under chassis and suspension components, and the contact page reaches the engineering desk directly.